Laser Cutter – Loading Material & Auto-Focus Laser
Before laser processing material, you will need to load material into the laser system and then auto-focus the laser assembly system onto the top surface of the material.
Be sure to visually inspect the laser cutter bay – you need a clean, flat laser cutter honeycomb bed to allow your material substrate to sit flush against the laser cutter bed. All cutting material needs to be flat across the surface plain and sit flush on the hex bed. Any flex (corner), bowing, cupping or extraneous material jutting upwards can not only modify/change the focal length of the laser resulting in improperly cut/engraved materials it will also impede or obstruct the laser cutter assembly while it is moving and cause serious physical damage to the laser cutter assembly and laser cutter machine.
LAMPE Hall Digital Fab Maker Space- Boss Laser Cutter LS 2430 LED Control Panel
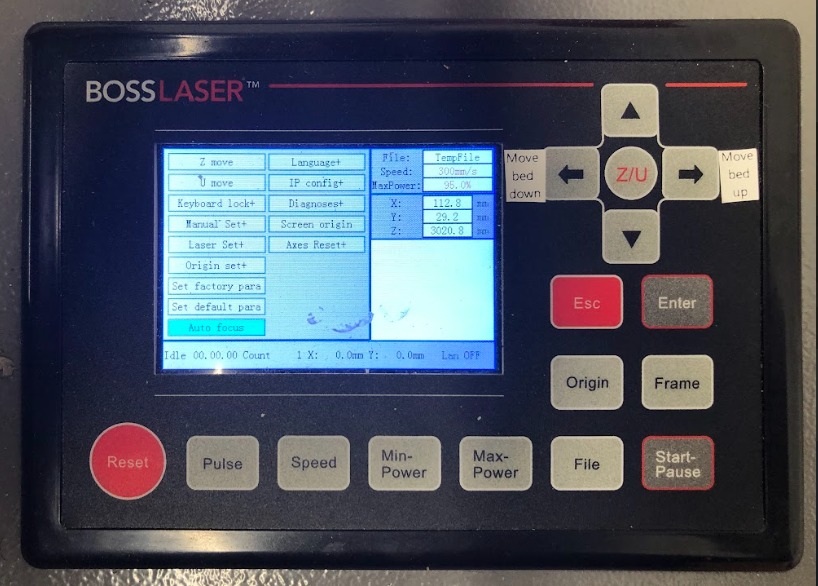
Z/U: AUTO-FOCUS:
Focusing the lens is a very important part of running this laser machine. The machine lens must be focused each time a material with a different thickness is placed on the working table. The laser uses highly focused light energy to its job and the focusing of the lens is necessary, thankfully it is quite easy.
In addition, the wattage of the laser cutters and the type of laser tube assembly used in the laser cutter machine will also change laser cutter focus. The laser cutters in the Leazar Materials Lab are 155 Watts while the laser cutters in the Lampe Digital Fabrication Studio and MakerSpace are 65 Watts and each have a different laser focus depth.
In the majority of situations Auto-Focus of the laser cutter will be your most direct and easiest procedure to setup and prepare the laser head assembly for cutting.
You should never need to extremely increase your cutting power and/or slow down the laser movement to achieve your desired cuts if your lens is properly focused. If you find that you are increasing the power or maxing the power to the laser – stop any cutting procedures and make sure the laser is properly focused and/or check with the lab attendant to see when the laser focus lens was last cleaned/repaired/replaced.
In the majority of situations Auto-Focus of the laser cutter will be your most direct and easiest procedure to setup and prepare the laser head assembly for proper cutting.
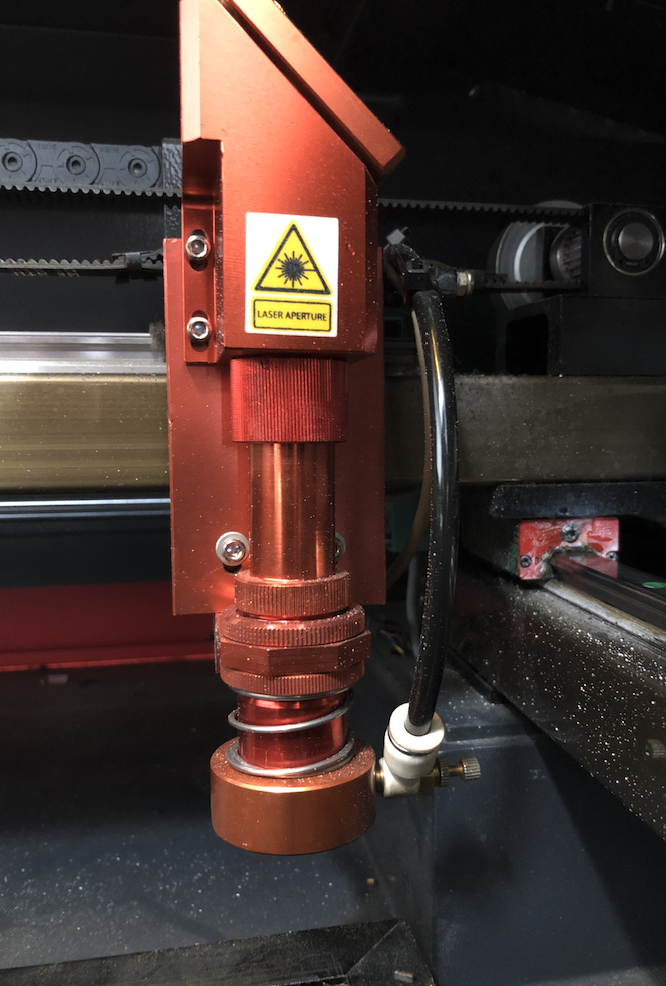
> WARNING: Always be careful when focusing your lens with thick material, do not allow the material to collide with the lens housing. This can cause SERIOUS DAMAGE to the laser machine.
Auto-Focus:
First, place the material on the working table and press the “Z/U” key on the LED control panel. Be sure that the nozzle is positioned above the material you wish to cut or engrave, not above the bare table.
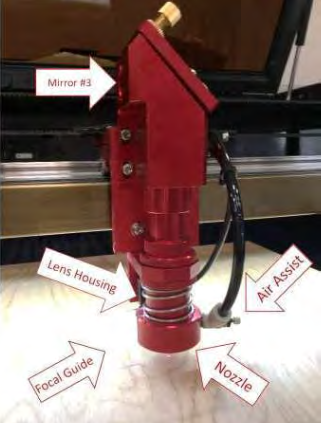
Make sure that the LENS HOUSING is able to freely move up and down the spring loaded column.
You can test this by carefully pushing up on the lower Focal Guide upwards. If the spring loaded column is stuck or is angled in any way the Focus Assembly may not work properly and needs to be reset or realigned. Be sure that you don’t accidentally disconnect the Air Assist nozzle when checking the movement range of the Lens Housing.
When your laser head nozzle is above the material, press the “Z/U” key once and then use your up/down arrow keys to navigate the options until the highlight is on “Auto Focus”.
Use the “Enter” key to select it and the Z-axis will automatically travel upwards until your material touches the nozzle of the laser head., it will then lower to the perfect focal point. Your lens is now focused, and your machine is ready to cut or engrave!
> NOTE Do not be alarmed – It will appear like the laser is going to smash into the material, but the assembly is spring-loaded and no damage should occur to the machine.
WARNING Stay Alert! – Use the emergency shutoff at any time you see the laser head assembly begin pushing down past your material substrate or the honeycomb cutting bed or you hear grinding noises as the laser head assembly is being lowered beyond the lower z-axis boundry. Lowering the laser head assembly beyond the honeycomb cutting bed will damage the laser.
Auto focusing is complete once the table stops moving.
To stop the Auto-Focus routine at any point during execution, press the Escape button.
Manual Focus:
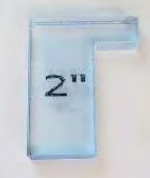
In the event that you want to manually focus the lens, the first step is placing your material on the worktable, next is locating the focal guide, this should be in your toolbox and will look like the image to the side. The focal guide will need to be placed on the ledge of the nozzle as shown in the image. While the focal guide sits on the ledge of the nozzle, use the up and down arrow keys on the control panel to move the Z-axis (the table) up or down. (It is best to hold your focal guide in place while you move the table). Once the material meets the focal guide, your lens is now focused!
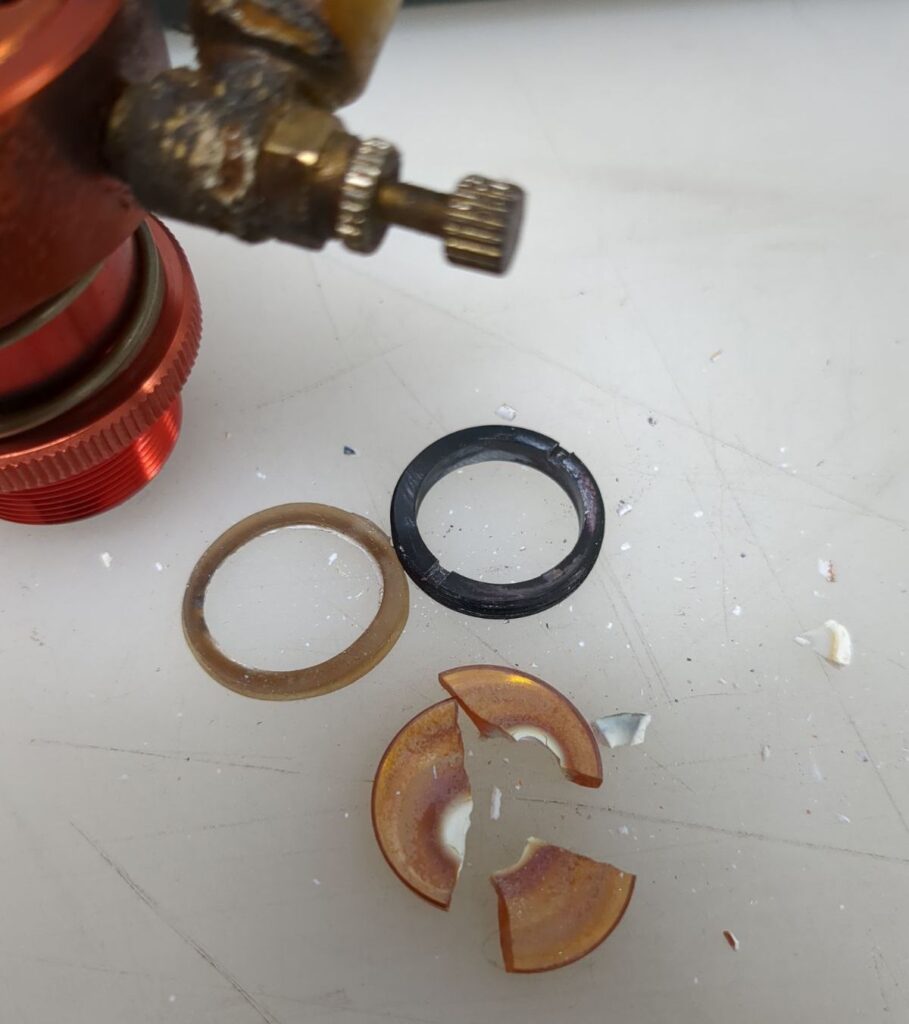
A NOTE ABOUT THE FOCUS LENS

Inside the Lens Housing sits the Focus Lens; this is needed to ensure that the laser is properly focused onto the substrate material you are using. The focal lens is a critical component of your laser machine, responsible for focusing the laser beam to a precise point on your material for cutting.
Over long periods of use it is possible that the laser focus lens in the machine may get cloudy or damaged and it will not make proper laser cuts. This often happens due to improper focus, laser housing alignment and/or improperly working air assist that is crucial to help clean away smoke, soot and debris.
Keeping this lens clean is essential for several reasons:
Optimal Laser Performance: A clean lens ensures that the maximum amount of laser power is transmitted to the material. Any dirt, dust, or residues on the lens can scatter or absorb the laser beam, reducing its intensity and effectiveness.
Safety: A dirty lens can increase the risk of fire hazards. When residues on the lens burn, they can create a flame or excessive heat, posing a safety risk. Keeping the lens clean reduces these risks, ensuring a safer operating environment.
Efficiency and Consistency: A clean lens ensures that your machine operates efficiently. A dirty lens might require multiple passes to achieve the desired effect, wasting time and energy. Consistent cleaning helps maintain an efficient workflow and reduces the need for rework or adjustments. Using the laser cutter with damaged lenses or dirty focus lenses will reduce the efficiency of the laser cutter and could damage the Laser Housing over time.
Do not attempt to modify, repair or fix the Lens Housing or clean the Focus Lens.
This procedure requires that the laser assembly to be placed under maintenance so that a full-time staff member or lab attendant can swap the laser focus lens with a new one or place the current one under a sonic bath for cleaning.
> NOTE Do not be alarmed – It will appear like the laser is going to smash into the material, but the assembly is spring-loaded and no damage should occur to the machine.
> WARNING Stay Alert! – Use the emergency shutoff at any time you see the laser head assembly begin pushing down past your material substrate or the honeycomb cutting bed or you hear grinding noises as the laser head assembly is being lowered beyond the lower z-axis boundry. Lowering the laser head assembly beyond the honeycomb cutting bed will damage the laser.
- Categories: